Best ever banana brownies (vegan, gluten-free, no added sugar)

vegan-gluten-free-banana-brownies

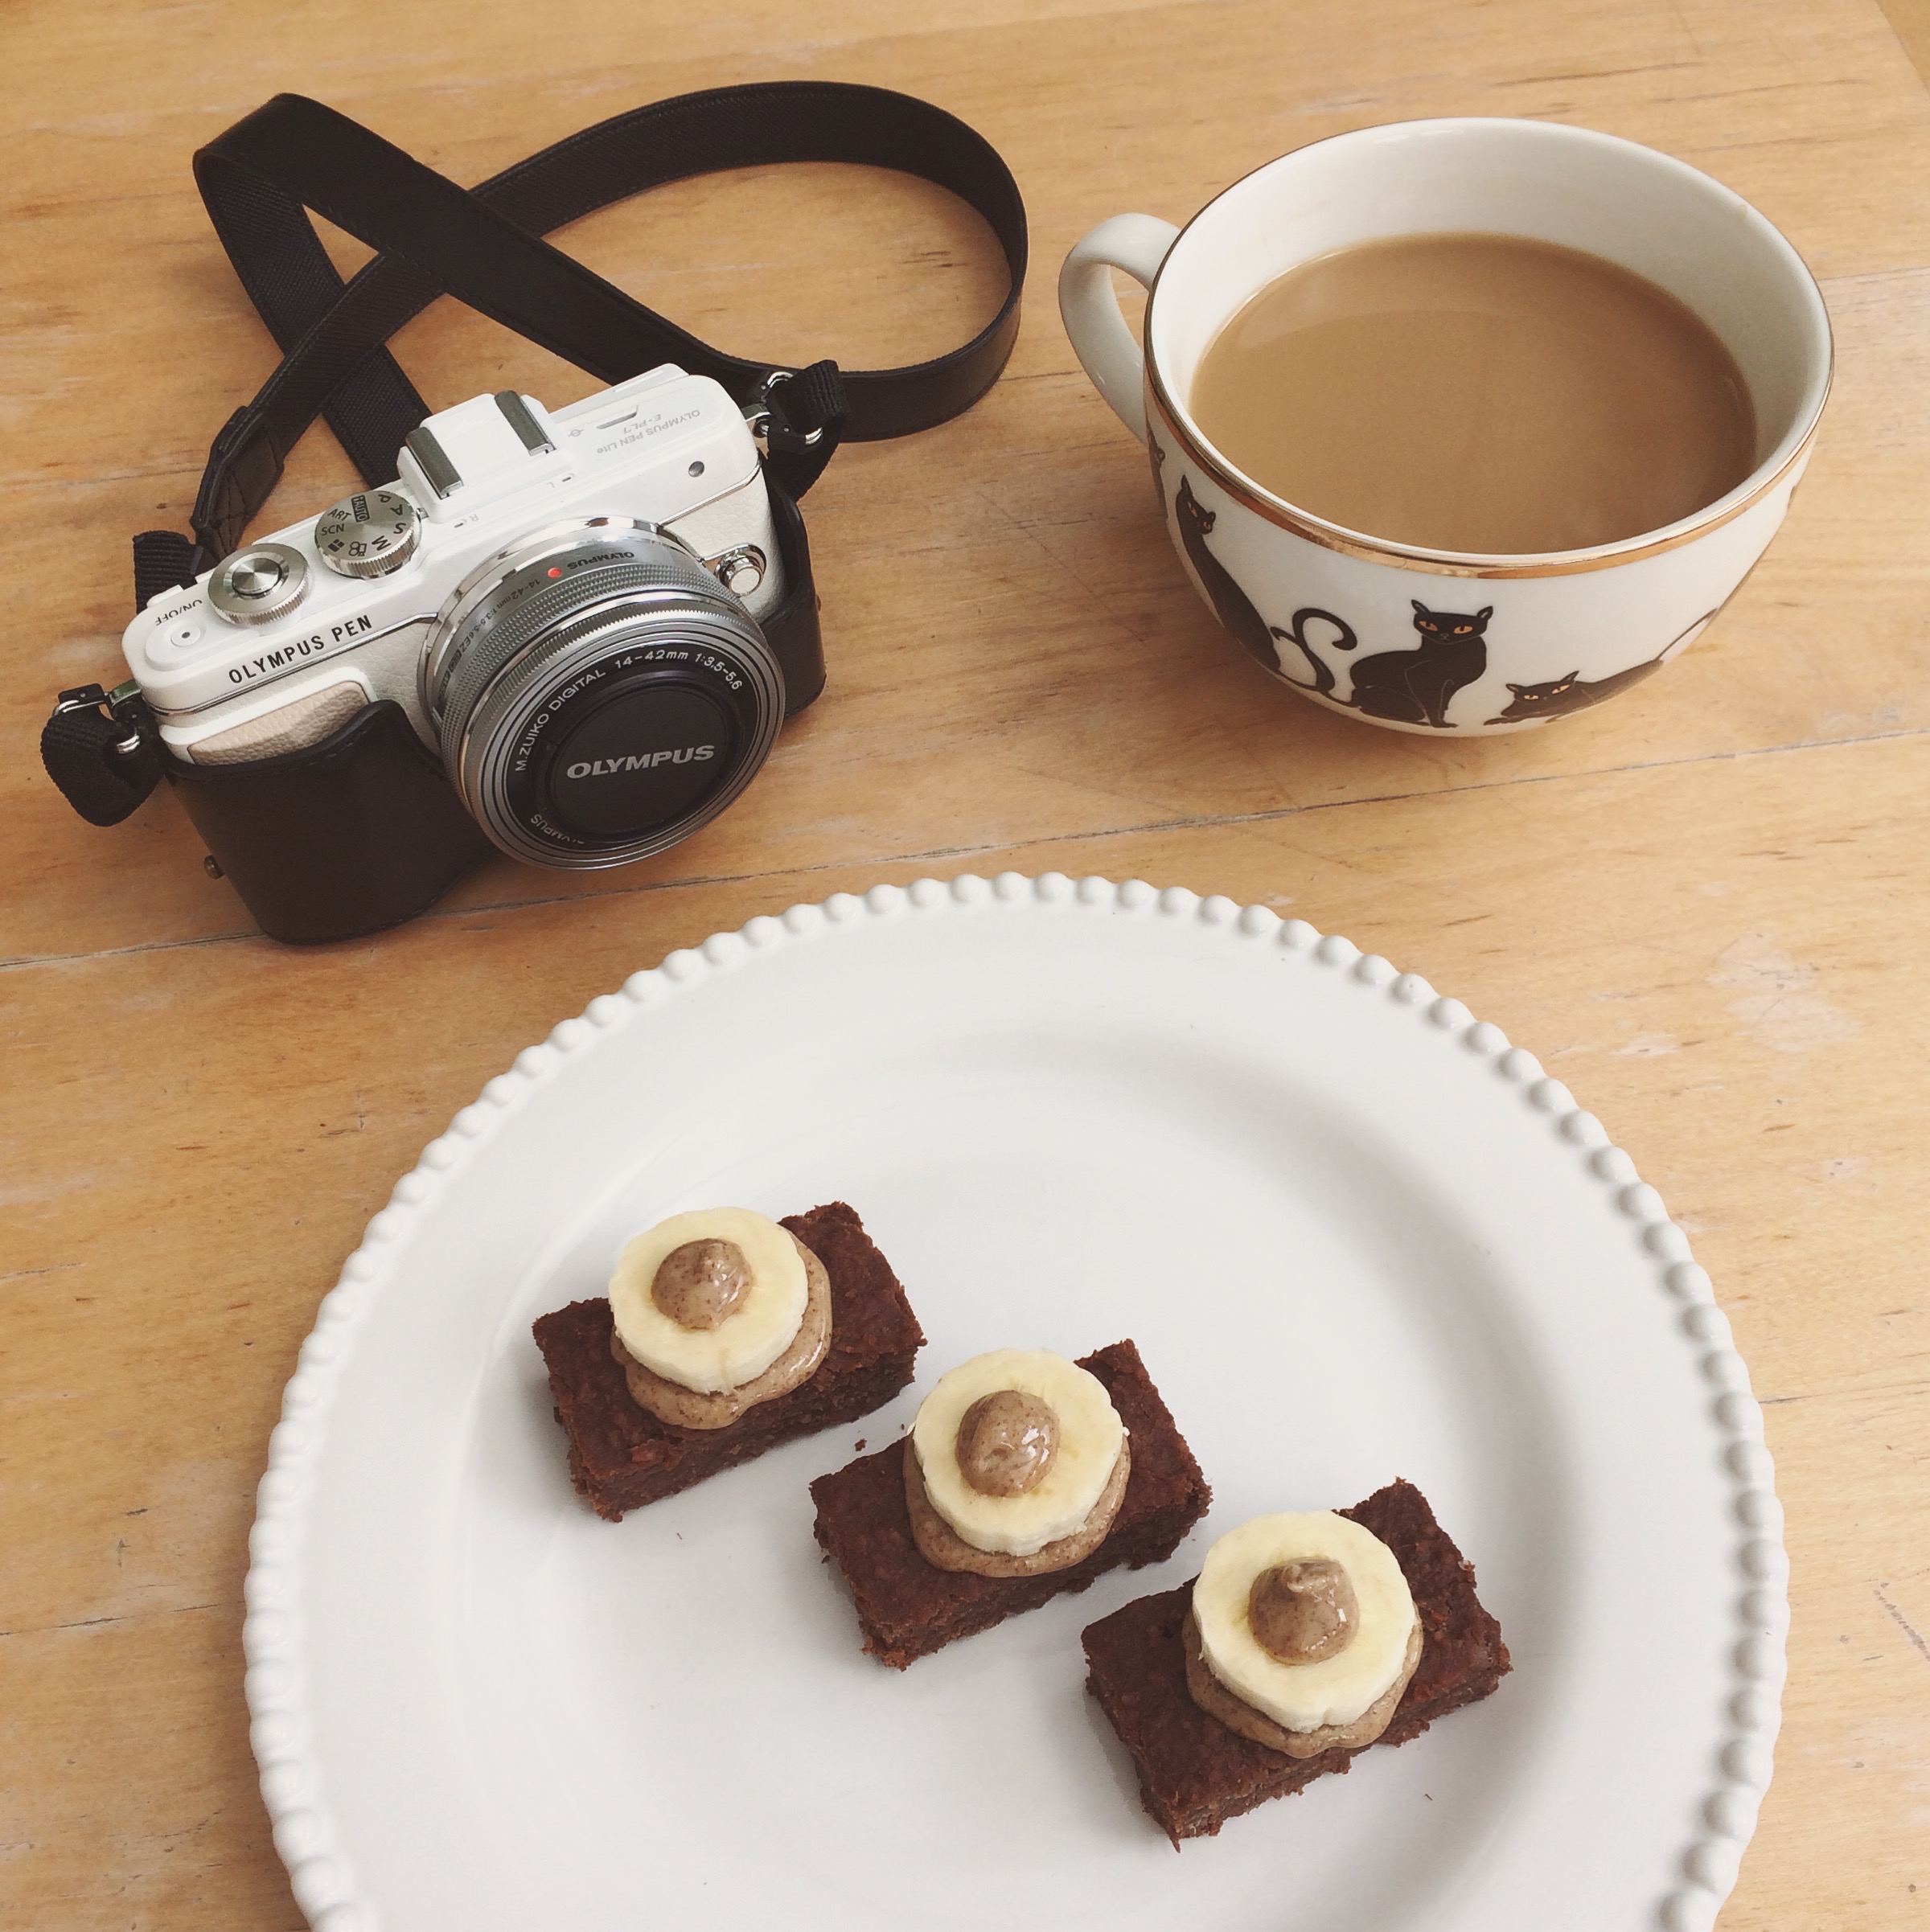
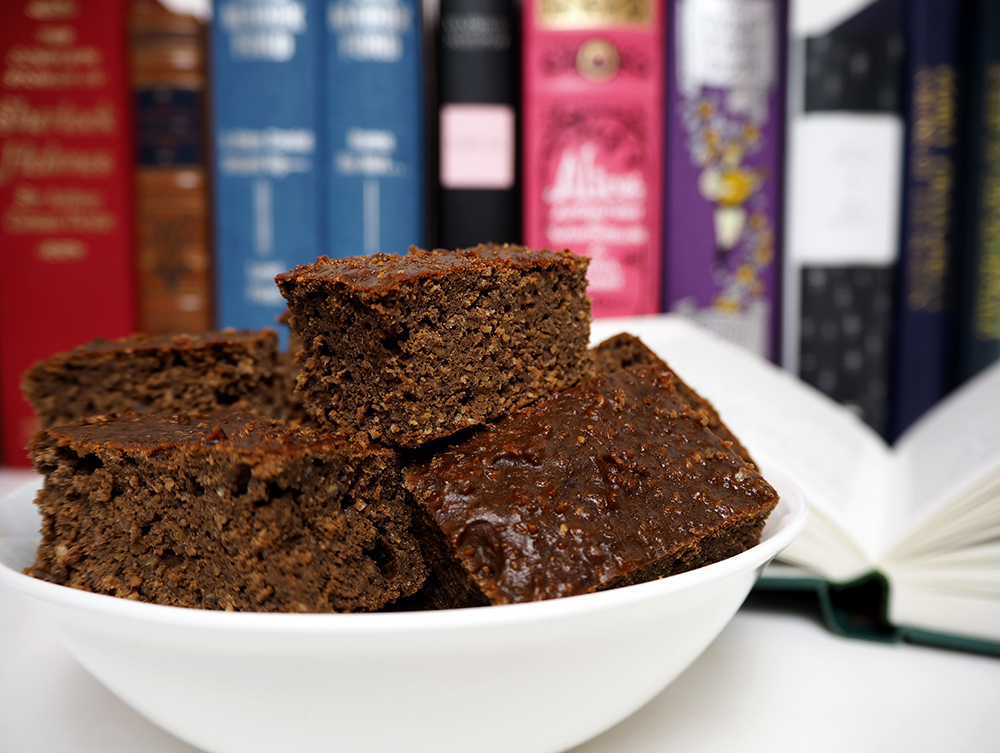
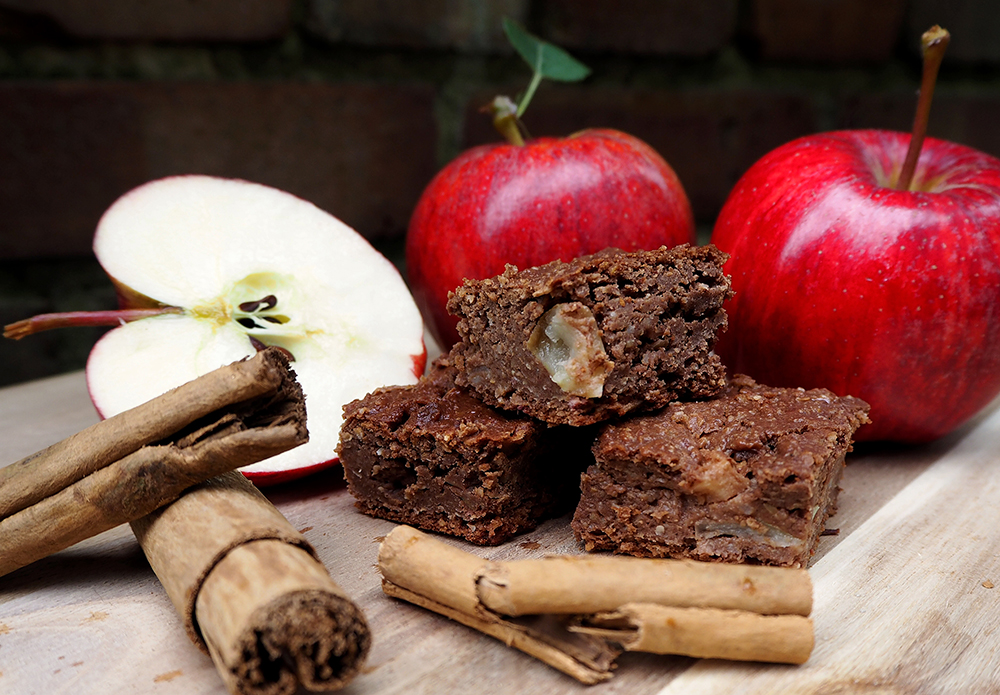
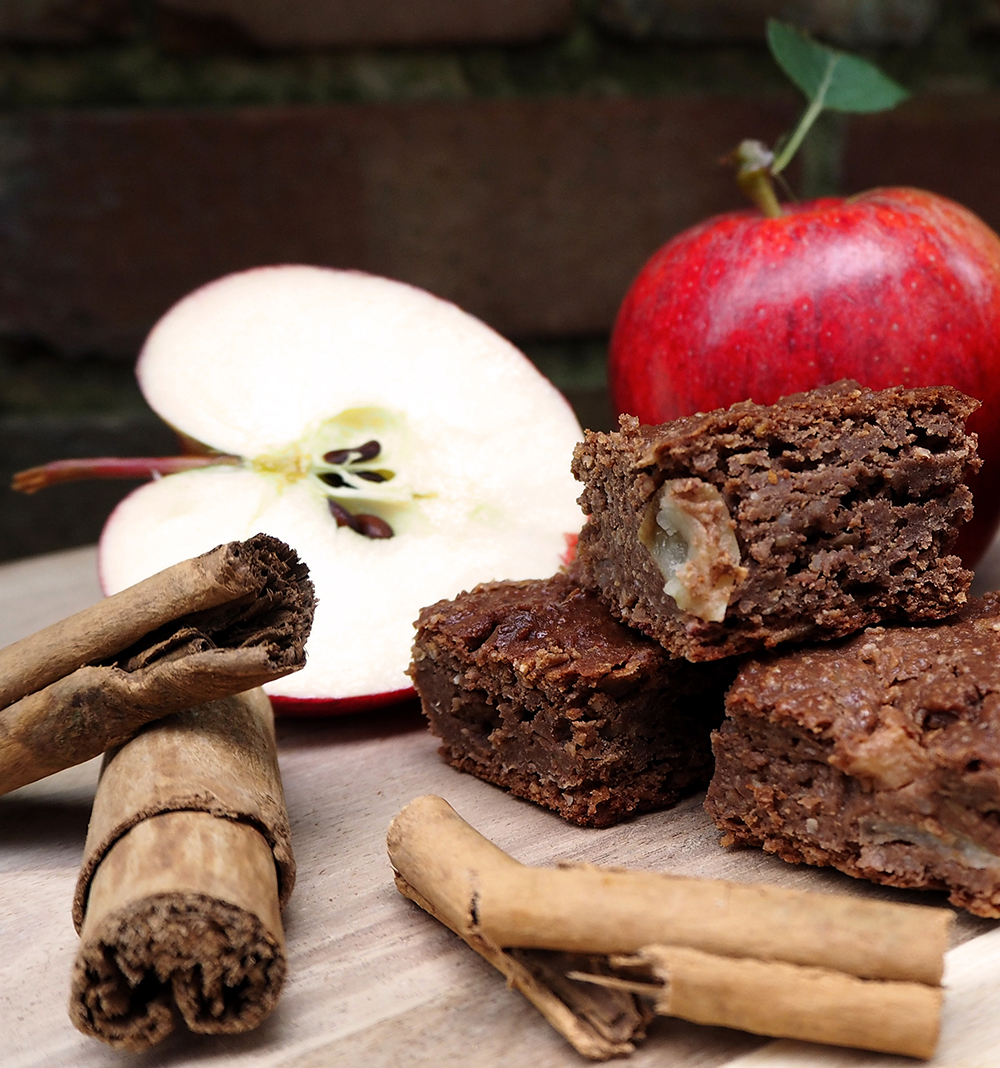
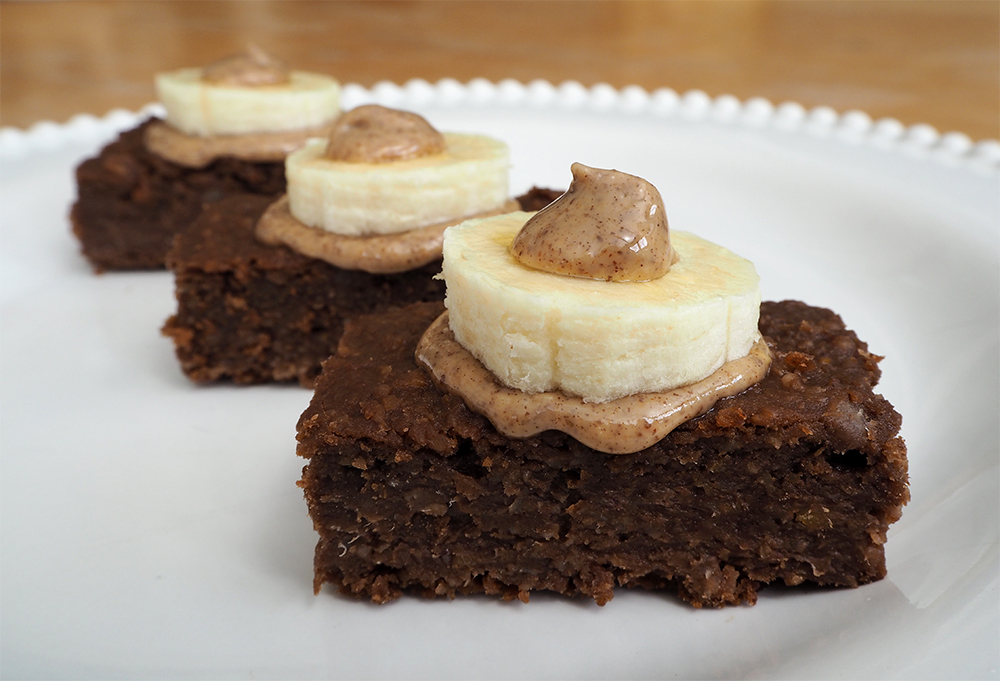
I’m not even kidding you – these are the best brownies ever. Gooey, chocolatey, banana-ey and gloriously guilt free, because they’re packed full of nutritious ingredients, with no added sugar.

As most of my brownies, they’re based on chickpeas, oats and dates. I don’t follow a gluten-free diet, but I prefer using chickpeas because it means you don’t need eggs and can still get a dose of protein. (I’m not vegan either, by the way, I just like to avoid dairy and eggs as much as I can.)

These can be whipped up in a food processor in five minutes and are a great way to use up very ripe bananas.


HEALTHY BANANA BROWNIES (VEGAN, GF)
Makes one 24cm square tin – ca 16 brownies

100g oats*
1 can (240g) chickpeas, rinsed and drained
150g dates
30g agave nectar
70g peanut butter (or other nut butter)
30g cocoa
1 tsp baking powder*
2 large ripe bananas (or three small ones)
250ml milk alternative (I use Oatly or Rice Dream, but nut milks work too
1 tsp coconut oil for the tin

Preheat the oven to 170°C. Brush a 24cm square (or equivalent size) brownie tin with coconut oil.

Put all the ingredients into a food processor and process everything into a smooth mixture.

Fill the mixture in to the brownie tin, spread evenly, and bake at 170°C for around 30 minutes, or until a toothpick stuck in the middle of the cake comes out clean. It’s ok if you still get a slight wobble in the middle; that will ensure you get a brownie-like consistency.

Leave to cool in the tin, then cut into squares or slices.


Store in the fridge. They’ll keep up to a week.

* To ensure the brownies are gluten-free us GF-certified oats and baking powder.

banana-brownies-photo-session

The best ever healthy brownies! (Vegan, GF, no added sugar)

vegan-gluten-free-brownies

Not going to lie: I love cake. One of the biggest challenges of consistent healthy eating is to resist the temptation of sugary treats. Of course I eat them – occasionally. But cutting down on sugar has done so much good for my health – happier stomach, clearer skin, no more insane blood sugar fluctuations – and I’d like to keep it that way. I can’t go long without sweet treats though, so to prevent the inevitable sugar binge I have integrated a load of healthy sweet alternatives into my daily diet.

One of them is this brilliant cake alternative, which is not just utterly delicious but also incredibly versatile. I always have a batch in the fridge and rely on them for my daily afternoon snack – you know, that 3pm low in the office when everyone gets their Snickers out and you’re just dying for a quick energy boost.

These brownies are based on chickpeas, dates, nut butter and oats, making them vegan, gluten-free and refined sugar free. My version is medium sweet, so if you have a very sweet tooth just up the amount of agave nectar a bit. You can also add chopped nuts, a mashed banana, a couple of shots of espresso or chocolate chunks to jazz things up a bit.

The recipe is very flexible and has already evolved into an exciting range of other cakes. My favourite variations so far are apple and cinnamon cake, spiced carrot cake and a total showstopper of a vanilla protein blondie. My friend took the basic recipe and turned it into a spiced pumpkin cake, and is also experimenting with a savoury version. This cake offers a lot of room for experiments.

So give it a try and get creative, throw in your own ideas and let me know in the comments if you come up with new variations!

Sundays are for cake, coffee and good books


THE BEST HEALTHY BROWNIES
Makes one 24cm square tin – ca 16 brownies

100g oats*
1 can (240g) chickpeas, rinsed and drained
100g dates
40g agave nectar
50g peanut butter (or other nut butter)
30g cocoa
1 tsp baking powder*
250ml milk alternative (I use Oatly or Koko, but almond milk works too)
1 tsp coconut oil for the tin

Preheat the oven to 175°C. Brush a 24cm square (or equivalent size) brownie tin with coconut oil.

Put the oats in a food processor and blitz until they are finely ground. Add all the other ingredients and process everything into a smooth mixture.

Fill the mixture in to the brownie tin, spread evenly, and bake at 175°C for around 30 minutes, or until a toothpick stuck in the middle of the cake comes out clean. It’s ok if you still get a slight wobble in the middle; that will ensure you get a brownie-like consistency.

Leave to cool in the tin, then cut into squares or slices.


Keeps in the fridge up to one week. (They might keep longer but I haven’t tested that as they never survive more than a week in my fridge!)

* To ensure the brownies are gluten-free us GF-certified oats and baking powder.

Vanilla protein blondies: a gluten-free, low-fat, healthy treat

vanilla-protein-brownies-vegan-glutenfree-1

Of all the chickpea-based alternative cakes, these indulgent but guilt-free vanilla blondies are definitely the most popular variation so far. They are as sweet and delicious as real cake, but low in fat, gluten-free and high in protein as the rely on chickpeas instead of the usual flour-eggs-butter basis.

The more I experiment with chickpeas, the more amazed I am at the versatility this little pulse offers for baking sweet treats. For the past half year or so, I’ve had a batch of chickpea-based cake slices – flavoured with different ingredients, from cocoa to apple and lemons to almond – in my fridge in any given week. They’re my go-to energy-boosting snack for long afternoons in the office, and a healthy treat for whenever I fancy something sweet.

This blondie version happened when I threw some of my favourite vanilla protein (Diet Whey from PhD) into my basic brownie recipe to see what happens. What happened was simply awesome cake!

vanilla-protein-brownies-vegan-glutenfree


GLUTEN-FREE VANILLA PROTEIN BLONDIES
Makes one 24cm square tin – ca 16 pieces

1 can (240g) chickpeas, rinsed and drained
100g dates
100g vanilla flavoured protein powder (I use PhD Diet Whey)
50g oats*
40g agave nectar
50g peanut butter (or other nut butter)
1 tsp baking powder*
250ml milk alternative (I use Oatly or Koko Dairy Free, but almond milk also works)
1 tsp coconut oil for the tin

Preheat the oven to 175°C. Brush a 24cm square (or equivalent size) brownie tin with coconut oil.

Put the oats in a food processor and blitz until they are finely ground. Add all the other ingredients and process everything into a smooth mixture.

Fill the mixture in to the brownie tin, spread evenly, and bake at 175°C for around 30 minutes, or until a toothpick stuck in the middle of the cake comes out clean. It’s ok if you still get a slight wobble in the middle; these are nicer slightly undercooked so they don’t go too dry.

Leave to cool in the tin, then cut into squares or slices.


These blondies keep in the fridge for around a week.

* To ensure the cake is gluten-free us GF-certified oats and baking powder.

Gorgeously nutty carrot cake (vegan, gluten-free, no added sugar)

vegan-protein-carrot-cake-3

This week’s healthy treat is a lovely carrot and hazelnut cake with a warming kick from cinnamon and a bit of cocoa. These slices of guilt-free goodness are vegan, gluten-free and free from refined sugar, relying only on the natural sweetness of the ingredients.

This is another variation on my recent experiments with cakes based on chickpeas. Yes really. The humble chickpea eliminates the the need for eggs and flour and adds some extra protein, and you can’t taste it so nobody will ever guess your healthy secret!

The carrot flavour isn’t too obvious in this recipe, but adding a couple of finely shredded carrots will add lightness and moisture, and the crunch from the chopped hazelnuts brings it to perfection.

carrot-cake-carrots-2


VEGAN, GLUTEN-FREE CARROT AND HAZELNUT CAKE
Makes around 24 slices

100g carrots, in chunks
100g dates, pitted
1 can (240g) chickpeas, rinsed and drained
100g oats*
1 heaped tsp baking powder*
20g cacao (or vegan-friendly cocoa powder)
2 tsp cinnamon
50g smooth hazelnut or peanut butter
200 hazelnut milk (or other nut / oat / coconut milk)
30g agave nectar
100g hazelnuts, chopped

Preheat the oven to 175°C. Brush a 24cm square (or equivalent size) brownie tin with coconut oil.

Put the oats in a food processor and blitz until they are finely ground.

Add all the other ingredients, except the hazelnuts, and process everything into a smooth mixture. Stir in the chopped hazelnuts.

Fill the mixture in to the brownie tin, spread evenly, and bake at 175°C for 35-40 minutes, or until a toothpick stuck in the middle of the cake comes out clean.

Leave to cool in the tin, then cut into squares or slices.

Keeps in the fridge up to one week – if you can manage to not eat them sooner.

* To ensure the cake is gluten-free us GF-certified oats and baking powder.


vegan-protein-carrot-cake-2

Vegan, gluten-free, super healthy apple and cinnamon cake

vegan-gluten-free-apple-cinnamon-cake

I’m on a mission to prove that healthy cake can be just as delicious as traditional cake, and this recipe definitely is a case in point.

Imagine all the goodness of sweet, moist apple cake with the warmth of cinnamon and a hint of chocolate, but without any butter, flour or refined sugar. This recipe uses chickpeas instead of flour, which makes it gluten-free and has the added benefit of swapping out some of the carbs for protein. You won’t be able to taste the chickpeas, promise. As my friend said after she tried these, “I can’t believe it’s chickpeas!”

I rely on these cakes for my mid-morning snacks, for a light energy boost before workouts…and basically for all my cake needs.

The basic recipe also works in all sorts of other flavour combinations, and over the next few weeks I’ll be posting a brownie version, a vanilla protein blondie version, and carrot cake variation on the apple recipe. So stay tuned for more gorgeous cake!

vegan-gluten-free-apple-cinnamon-cake-2


VEGAN, GLUTEN-FREE APPLE AND CINNAMON CAKE
Makes one 24cm square tin

100g oats*
1 can (240g) chickpeas, rinsed and drained
100g dates
30g agave nectar
50g peanut butter
30g cocoa
2 tsp cinnamon
1 tsp baking powder*
250ml milk alternative (I use Oatly or Koko, but almond milk works too)
2 apples, chopped, half put aside
1 tsp coconut oil for the tin

Preheat the oven to 175°C. Brush a 24cm square (or equivalent size) brownie tin with coconut oil.

Put the oats in a food processor and blitz until they are finely ground.

Add all the other ingredients (reserving half of the chopped apples) and process everything into a smooth mixture. Stir in the remaining apples with a wooden spoon.

Fill the mixture in to the brownie tin, spread evenly, and bake at 175°C for 35-40 minutes, or until a toothpick stuck in the middle of the cake comes out clean. It’s ok if you still get a slight wobble in the middle; that will give the cake a brownie-like consistency.

Leave to cool in the tin, then cut into squares or slices.


Keeps in the fridge up to one week. (They might keep longer but I haven’t tested that as they never survive more than a week in my fridge!)

* To ensure the cake is gluten-free us GF-certified oats and baking powder.

Gooseberry cupcakes with a granola crumble topping

gooseberry-crumble-cupcakes-1

Summer has finally arrived, and with it punnets of gorgeous berries everywhere you look. I love berry season – from the moment you bit into the first strawberry of the year to the harvest of juicy, sharp blackberries later in the summer. And there are endless ways to enjoy them. Think fresh berries to top your breakfast toast for a healhty alternative to jam. Think smoothies – sweet strawberries and peaches, for example, or refreshing blueberry and mint. Or mid-afternoon snacks – all I need in summer is a punnet of blueberries to get me through those hours in the office. And, of course, cake! Cupcakes in particular – the combination of tiny cakes and berries is a guaranteed winner for any occasion.

Gooseberries are often overlooked when it comes to baking but they are gorgeous in cake. Their fresh, tart flavour balances out the sweetness beautifully, adding a bit of zing to your bake.

For these cupcakes I’ve used dark brown sugar instead of white because it gives you a subtler, richer sweetness. And by replacing half the white flour with wholegrain spelt, you can deepen the flavour even more and get a more interesting texture while keeping your cakes perfectly light and fluffy.

Crumble toppings work well with berries and they’re a great way to make your cupcakes look pretty without having to muck about with frosting – for example when it’s so hot that your buttercream would just melt off, or you don’t want to go all out on the calories – and throwing in a handful of granola adds a lovely bit of extra crunch.

gooseberry-crumble-cupcakes-2


INGREDIENTS
Makes 12 cupcakes

200g gooseberries
90g self-raising flour
85g wholemeal spelt flour
1 tsp baking powder
115g unsalted butter, softened
115g dark brown sugar
2 large free-range eggs
1 tsp vanilla essence
1 tbsp milk

FOR THE TOPPING
50g unsalted butter
50g plain flour
50g granola
2 tbsp dark brown sugar
icing sugar, to dust


TO MAKE THE CUPCAKES

  1. First prepare the topping: Cut the butter into small pieces and rub it into the flour until it looks like coarse breadcrumbs. Stir in the granola and the sugar.
  2. Preheat the oven to 180°C and line a 12-hole muffin tin with paper cases.
  3. Wash the gooseberries and pat them dry. Top and tail them, cut them into half and dust with a little flour – this is to keep them from sinking to the bottom of the cakes during the baking.
  4. Beat the butter and sugar together until light and creamy, then beat in the vanilla essence and egg until fully incorporated.
  5. Mix the two flours and baking powder and sift over the mixture. Gently fold in along with the milk, then fold in the gooseberries.
  6. Spoon the mixture into the cases, filling them no more than two thirds. Spoon the crumble mixture over the top and press down slightly.
  7. Bake in the middle of the oven at 180°C (fan) for about 20 minutes, or until a skewer or toothpick inserted in the centre comes out clean.
  8. Leave to cool in the tin for 10 minutes, then transfer to a wire rack. Once the cupcakes are cooled completely, dust them lightly with icing sugar.

If you can’t get hold of gooseberries, these cupcakes also work beautifully with other slightly sharp berries, such as raspberries or blackberries.

gooseberry-crumble-cupcakes-4

For some more baking ideas with summer berries, check out these recipes:

Skinny raspberry and white chocolate muffins

Gluten-free blueberry and cream cheese cake

Skinny courgette, cocoa and pistachio cupcakes

Well, I’m not sure how skinny they actually are, but un-iced, these cupcakes contain no fats other than those that naturally occur in the other ingredients. So that makes them pretty skinny in my book. They’re also largely courgette based so they must count as at least one of your five a day. See, they’re practically healthy!

Light, chocolatey, delicious, and probably one of your five a day.


INGREDIENTS

Makes 15 cupcakes
100g shelled pistachios
3 eggs
180 light brown muscovado sugar
300g courgettes
120g self-raising flour
60g cocoa powder
½ tsp salt

For the icing
100g unsalted butter
100g icing sugar
50g cocoa powder
50g shelled pistachios


TO MAKE THE CUPCAKES

  1. Preheat the oven to 170°C and line two muffin tins with 15 paper cases.
  2. Peel the courgettes and grate them finely.
  3. Grind the pistachios in a food processor or mill until they are are powdery. The finer they are ground, the better the cake.
  4. Whisk the eggs and sugar until they are pale and fluffy. Beat in the courgettes and ground pistachios, then beat in the flour and salt until well combined. The mixture will be quite drippy.
  5. Spoon the mixture into the cases, filling them no more than two thirds. Bake for 20 minutes, or until a toothpick inserted into the centre of a cupcake comes out clean. Leave to cool in the tins for a few minutes, then transfer to a wire rack to cool.

TO DECORATE

  1. For the icing, beat the cubed butter until fluffy, then gradually beat in the icing sugar. Beat in the sifted cocoa and keep beating until everything is creamy and well combined. Spread the icing evenly on the cupcakes.
  2. Crush half the pistachios and leave the other half whole. Sprinkle them over the cupcakes and leave to set for a bit.

This delicious recipe is adapted from Harry Eastwood‘s chocolate and courgette cake as published in Waitrose Kitchen.

Luxurious gluten-free blueberry and cream cheese cake

I needed a birthday cake for a friend who can’t eat gluten. I’d never tried any gluten free baking but did remember a cake my granny used to bake when I was a kid. The recipe uses finely ground hazelnuts instead of flour, so it’s perfect if you want to avoid gluten. And the hazelnuts combined with cocoa powder also give the cake a wonderfully deep flavour and a light, moist texture.

You can make this cake with pretty much any kind of creamy filling and fruit. The original recipe uses whipped cream mixed with a type of conserved berry that’s widespread in Germany but not available in the UK, so I chose blueberries and cream cheese instead. (Can’t go wrong with cream cheese frosting and blueberries!)


Gluten free and with extra flavour thanks to the hazelnut-cocoa base: The perfect alternative.

The butterflies and leaves are cut out of icing using Lakeland icing cutters. I was going to make flowers originally, but then just really liked the idea of butterflies nibbling on clusters of blueberry-flowers.


INGREDIENTS

For the cake
150g unsalted butter, softened
150g caster sugar
1 tsp vanilla essence
4 eggs, beaten
200g finely ground hazelnuts
3 tbsp cocoa powder
3 tsp baking powder

For the frosting
60g unsalted butter, softened
200g full-fat Philadelphia
200g icing sugar
300 g blueberries
1 tbsp blueberry jam

To decorate
A handful of blueberries
Green and yellow icing
Leaf and butterfly icing cutters


TO MAKE THE CAKE

  1. Preheat the oven to 180°C. Grease two 20cm diameter cake tins lightly with butter.
  2. Beat the butter, adding the sugar until the mixture becomes creamy. Beat in the vanilla essence, then gradually add the beaten eggs until the mixture is well combined.
  3. In a separate bowl mix the finely ground hazelnuts with the cocoa and baking powder. Add to the butter mixture and fold in gently.
  4. Divide the mixture between the two cake tins and bake for 20-30 minutes, or until a skewer inserted in the centre of each cake comes out clean.

TO MAKE THE FROSTING AND DECORATION

  1. Place one cake on a cake stand, cover with the blueberry jam and spread a layer of blueberries on it.
  2. Beat the butter, Philadelphia and icing sugar into a smooth cream. Spread half of the cream over the blueberries and smooth out evenly up to the edges. Top with the second cake and spread the remaining cream cheese mixture on top, again smoothing it out evenly. Stick the cake in the fridge for 30 minutes to allow the cream to set a bit.
  3. In the meantime, cut out a selection of different sized leaves from green icing and butterflies from yellow icing. Arrange them on top of the cake with small clusters of blueberries.
  4. For extra prettiness, push a line of blueberries into the cream layer around the side of the cake.

Icing cutters are cheap, and one of the simplest ways to make impressive decorations.

Quick, skinny raspberry and white chocolate muffins


Making the most of the season’s berries while summer lasts!

The summer bake-a-thon continues! With English produce finally arriving in the supermarket, I’m in a rush to make as much of the berry season as I possibly can. This week’s quick and easy summer muffins are super light and juicy, stuffed full of whole raspberries and melt-in-your-mouth white chocolate chunks. And with low-fat yogurt replacing most of the butter in the recipe, they’re practically skinny! =)


INGREDIENTS
Makes 14 cupcakes

80g unsalted butter, softened
100g light brown soft sugar
3 large eggs, beaten
1 tsp vanilla extract
150g natural low-fat yogurt
300g self-raising flour
220g raspberries
120g white chocolate, chopped
7 extra raspberries

TO DECORATE
50-80g white chocolate


TO MAKE THE CUPCAKES

  1. Preheat the oven to 180°C and line two muffin tins with 14 paper cases.
  2. Cream the butter, adding the sugar until it becomes fluffy. Gradually mix in the eggs and beat well. Beat in the yogurt and vanilla extract.
  3. Sift the flour over the mixture and stir in until just combined. Finally, fold in the whole raspberries and the chocolate chunks.
  4. Spoon the mixture into the cases, filling them no more than two thirds. Cut the remaining raspberries in half and put one half on top of each cupcake with the sliced side facing down. Bake for 12 to 15 minutes, or until a toothpick inserted into the centre of a muffin comes out clean. Leave to cool in the tins for a few minutes, then transfer to a wire rack to cool.

TO DECORATE

  1. Once the muffins are cooled completely, melt the chocolate (for example by blitzing it in a cup in the microwave for 2 x 20 seconds). Fill the melted into a small freezer bag, snip one corner and use this ingenious device to drizzle the muffins evenly with as much chocolate as your heart desires. (They might not be so skinny after all.)


If you leave some chunks of white chocolate sticking out at the top, your muffins will get a delicious, almost caramelised crust.